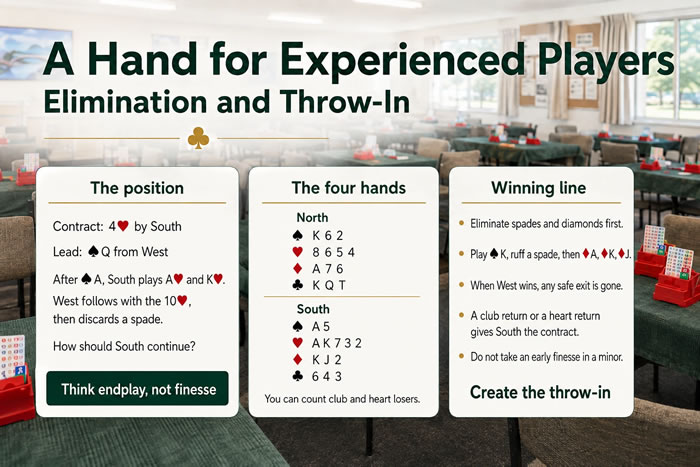
East is dealer and nobody is vulnerable. You reach 4♥ by South and West leads the Q♠.
Declarer wins with the ace and plays the ace–king of hearts. West follows with the ten, then discards a spade.
Work out your plan before revealing the East and West hands.
The deal
North
West
Think first…
East
Think first…
South
The winning plan
1. Count the losers
You have certain losers in the ♣A and ♥Q, plus threatened losers in the ♦Q and ♣J.
2. Eliminate
Remove the spade and diamond suits before giving up the lead. This takes away the defenders' safe exit cards.
3. Throw them in
Once West wins the diamond, a club or heart return helps you, while a spade concedes a ruff and discard.
West wins. West cannot play the fourth spade without conceding a ruff and discard, so a club exit is likely. Play the king.
If East wins, East is end-played: a spade gives you a ruff and discard, while a club return plays into the Q–T club tenace. If East ducks, give East the ♥Q producing the same end play.